Posts mit dem Label MakeUp werden angezeigt. Alle Posts anzeigen

Sonntag, 31. Mai 2015

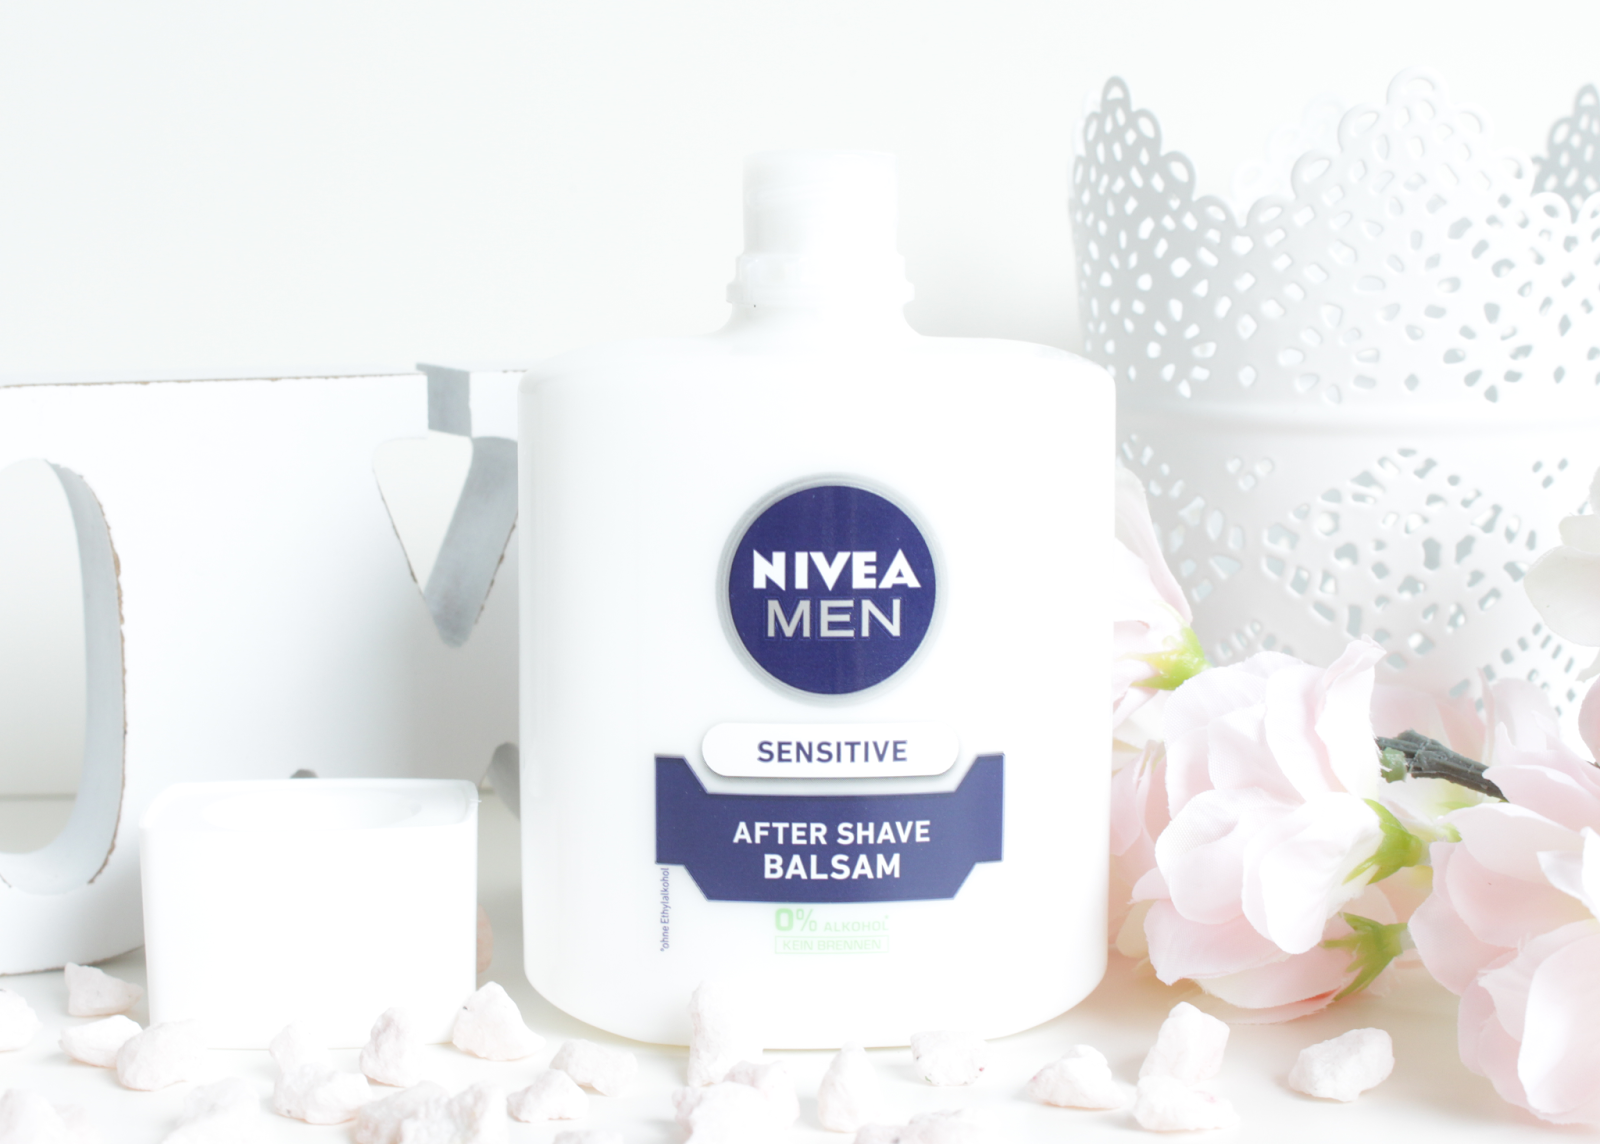
Nivea Men After Shave Balm // Face Primer

Hi everyone!

Today I have a quick little hot buy for you.
Of course, everyone loves a good face primer but they are often super expensive and the drugstore primers just don't work that well most of the time.
But what if you don't want to spend a monthly salary on a primer but still want something that moisturizes your skin and makes your foundation last all day? Will you just sit in a corner and cry of frustration? No. You just have to open your eyes and take something, what doesn't look like a primer at first sight. And maybe not at second sight.
The Nivea Men After Shave Balm.
Whaaaat? Yep. I'm totally serious.
Nikkie (from Nikkietutorials on YouTube) mentioned it in a lot of her recent videos and so I thought I'd give it a try. 
And really. 
It hydrates the skin in an amazing way and makes you foundation last so much longer! And why? Well, take a look at the ingredients. The second mentioned ingredient is glycerine and that's what makes your foundation stick to your skin. 
It's amazing. Trust me. Try it.
It's really cheap and the manly scent disappears after a few minutes.
I highly recommend this one, I don't even use my expensive primers anymore!
Oh and I use the sensitive version because... sensitive is always better. Women skin is sensitive. Yep.

Heute habe ich einen kurzen kleinen Kauftipp für euch. Mal ganz was neues. Keine ellenlangen Romane, nur ein paar Fakten. Denn überzeugen müsst ihr euch selbst. Hab es schließlich selber nicht geglaubt.
Also. Ihr kennt das ja. Wenn wir über Foundation reden, reden wir auch über Primer. Denn Primer ist super. Die Foundation lässt sich leichter auftragen, die Haut wird mit Feuchtigkeit versorgt und die Foundation hält und hält und hält. So sollte es zumindest sein. Leider findet man (bzw. ich) in der Drogerie kaum einen Primer, der wirklich hält was er verspricht. Um die 40€ für einen Primer ausgeben ist aber auch nicht gerade das Gelbe vom Ei. Was also tun? Auf den Boden legen und weinen, weil man kein halbes Monatsgehalt für einen Primer rauswerfen will aber trotzdem nicht nach zwei Stunden wie ein geschmolzenes Vanillieeis aussehen will? Nein. Denn hier kommt die Lösung. Man sucht nicht nach einem Primer. Sondern nach einem beliebigen Produkt, mit den Eigenschaften eines Primers. Und man findet.
Man findet das Nivea Men After Shave Balsam.
Waaas? Jawohl. Meine ich total ernst.
Nikkie (von Nikkietutorials auf YouTube) hat es in ihren letzten Videos in den Himmel gelobt und da dachte ich "Wieso nicht.", probieren geht schließlich über studieren. Und für etwas über 3€ kann man auch einen Fehlkauf riskieren. Aber es war keiner.
Das After Shave Balsam ist wirklich der absolute Megaoberhammer. Es spendet Feuchtigkeit, lässt die Foundation traumhaft auftragen und er verlängert die Haltbarkeit um für immer. Ungefähr. Aber warum das? Werft einen Blick auf die Inhaltsstoffe. Gleich als zweites finden wir dort Glycerin und das sorgt dafür, dass das Produkt wunderbar auf der Haut festgehalten wird, ohne dabei klebrig oder beschwerend zu sein.
Ich konnte auch nicht glauben, dass dieses Produkt wirklich so toll sein soll, wie Nikkie behauptet. Aber wirklich, es hat mittlerweile meine teuersten Primer ersetzt. Die stehen jetzt traurig in der Gegend rum. Tut mir sehr leid, aber sie können einfach nicht mithalten.
Also meine Lieben, probiert es aus. Mehr kann ich nicht sagen. Ihr findet es in jeder Drogerie, zwischen 3€ und 4€ seid ihr dabei und glaubt mir, ihr werdet es lieben.
Ich benutze die Sensitive Variante weil, naja, Sensitive klingt für mich immer besser.
Und keine Sorge, der herbe (um nicht zu sagen supermännliche) Geruch verschwindet nach ein paar Minuten!


Much love,

Alina

Mittwoch, 27. Mai 2015

Etude House Precious Mineral BB Cream - Perfect Fit

Hi guys!

So today's post is again about a foundation. Well, about a BB cream but as we're talking about super light stuff for your face, this post might be more interesting for ghostly white people like me.
So the thing is, for super pale girls and guys, it's not only a struggle to find a matching foundation. It's, of course, also a struggle to find a fitting BB cream for the days were you don't feel like wearing a full face of make up.
Yep, I made my way to the drugstore. Why so ever. Of course, every BB cream was way too dark.
They always say funny things like "For very fair skin. It will magically match your skin tone.". Um, no. Sorry.
So I took a look at higher end BB creams and: nothing.
Then I watched several YouTube videos and people were talking about Korean BB creams which are supposed to be super light and I thought I'd give it a try.
Of course, there were bunches of different BB creams out there in Korea, but I heard of Etude House before so I decided to try one from that brand.

Heute geht's mal wieder um Foundation für die Blassnäschen unter uns. Genauer gesagt um BB Cream, aber das Problem ist ja quasi dasselbe. Sobald etwas Farbe ins Spiel kommt, wird es für die super Hellhäutigen Leutchen schwierig.
Da ich nicht unbedingt jeden Tag Foundation tragen möchte, war ich auf der Suche nach einer BB Cream, einfach etwas leichtes für jeden Tag.
Meine Suche habe ich erstmal in der Drogerie begonnen. Hätte ich mir sparen können, denn wie auch Foundations sind die dort erhältlichen BB Creams viiiel zu dunkel. Super. Wer gibt mir meine Zeit wieder?
Also habe ich auch einen Blick auf die High End BB Creams geworfen (Benefit, Dior, viele viele...) aber nein, auch da hatte ich kein Glück.
Bin ich also wieder auf's Sofa gewandert. YouTube an. Und los.
Tatsächlich bin ich da auf etwa aufmerksam geworden. Und zwar auf BB Creams aus Korea, wo Blässe als Schönheitsideal gilt (#antisonnenbankflavour) und die Creams dementsprechend wesentlich heller sind als hier.
Natürlich gibt es da auch wieder zig verschiedene, aber von Etude House hatte ich auch vorher schon gehört und entschied mich daher für eine BB Cream dieser Marke.

 
I ordered the Etude House Precious Mineral BB Cream - Perfect Fit in the lightest shade (from BeautyNet Korea by the way! click!).
It arrived about two weeks later and that's pretty good I think, it's a long way from Korea to Germany.
The packaging is really nice, you get a high amount of product (60ml/ 2.11oz) and it comes in a plastic tube WITH A PUMP! Excuse my screaming but pumps are everything.
The tube itself looks really nice and elegant and cute at the same time. I like that.
But let's talk about the product because this is what matters. 
The Koreans did a great job with the color. It is really light (comparable to MAC NW10) and more on the cool toned side. I often find foundations and BB creams too yellow, but this one is great. Not too yellow and not too pink. Just somewhere in between. It contains SPF30 what is amazing! You don't even really need sunscreen underneath. But it will flashback in photos, so maybe not the pick for photo shootings with massive flash.
Well, they say it is a BB cream so I imagined a light coverage, more like a tinted moisturizer. It's nothing like that. It is pretty thick and I would say it has a medium buildable coverage.
But the thing is, it still looks really nice and natural on the skin! The finish somewhere in between matte and dewy, I like to powder it a bit in my T zone.
For me, it applies best with a flat top kabuki brush and I use my regular primer underneath.
I've heard a few people saying that it doesn't last on them more than two hours, but it works better for me. It's not that 24 hour super duper long wearing formula, but I'd say it lasts for good six hours. Then I noticed a bit of creasing around my nose but nothing worse, so I'm totally okay with that.
For me, it wasn't really what I expected from a BB cream but I'm still super happy I got my hands on it.
It is super affordable and does a great job.
But if you're more into the super light finish, you would probably be more happy with something else.

Ich habe mir die Etude House Precious Mineral BB Cream - Perfect Fit in der hellsten Nuance bestellt (übrigens von BeautyNet Korea! klick!).
Schon knapp zwei Wochen später kam sie bei mir eingetrudelt - ganz schön fix für die Entfernung!
Die Aufmachung der BB Cream gefällt mir äußert gut, es handelt sich zwar um eine Tube, die aber trotzdem einen Pumpspender enthält! Jawohl! Pumpspender forever.
Die Gestaltung ist sehr hübsch, niedlich, mädchenhaft und trotzdem etwas elegant. Gefällt mir ebenfalls super gut.
Man bekommt auch eine ganze Menge an Produkt selbst, ganze 60ml! Zum Vergleich, Foundations kommen in der Regel mit rund 30ml daher.
Aber jetzt zur BB Cream selbst, denn die schönste Verpackung hilft gar nichts, wenn das Produkt dagegen im Schatten verschwindet.
Was die Farbe angeht, haben die Koreaner wirklich tolle Arbeit geleistet! Sie ist wirklich hell (in etwa vergleichbar mit MAC NW10) aber trotzdem eher kühl und neutral gehalten, also weder zu gelblich, noch zu rosig. Perfect Fit eben.
Und sie enthält Lichtschutzfaktor 30 was ich persönlich wirklich klasse finde. Schließlich muss man seine Haut schützen. Sonnenstrahlen, die einem die Haut wegbrutzeln, sind leider nicht so cool wie immer noch einige Leute denken. Allerdings eignet sich die BB Cream daher nicht so gut für Blitzfotografien. Kennt ihr die Fotos von Promis auf roten Teppichen, die fiese weiße Schimmerflecken im Gesicht haben? Ja, daher kommt's. Für Fotos lieber auf SPF verzichten.
Gut, Etude House bezeichnet sie als BB Cream. Naaaaja. Ich verstehe unter einer BB Cream etwas leichtes. Leichte Deckkraft, leichtes Gefühl. Hm. Das ist leider nicht unbedingt der Fall. Sie ist ziemlich dickflüssig und ich würde schon behaupten, wir haben es mit mittlerer, aufbaubarer Deckkraft zu tun.
Aber der Witz ist, sie sieht dennoch sehr natürlich auf der Haut aus! Sie lässt sich wunderbar verblenden und das Finish ist irgendwo zwischen matt und natürlich glänzend einzuordnen. Ein bisschen Puder auf die T-Zone geworfen und fertig.
Ich trage sie am liebsten mit einem Flat Top Kabuki Pinsel auf und verwende meinen normalen Primer (der übrigens ständig wechselt, funktionieren aber alle) darunter.
Ich habe in einigen Reviews gelesen, dass die BB Cream nicht länger als zwei Stunden auf der Haut hält aber da muss ich etwas gegen stimmen. Bei mir hält sie schon gute sechs bis acht Stunden bevor sie sich etwas an den Nasenflügeln absetzt.
Insgesamt war die Etude House Precious Mineral BB Cream nicht wirklich ganz das, was ich erwartet hatte, aber sie macht trotzdem einen tollen Job und ist mein täglicher Begleiter geworden.
Falls ihr aber auf der Suche nach etwas super leichtem, mehr in Richtung getönte Tagescreme seid, ist sie wahrscheinlich nicht die beste Wahl. Aber keine Panik, ich suche weiter.

 
one pump

... and blended!
 

Much love,

Alina

Montag, 18. Mai 2015

Benefit Roller Lash Mascara // Review

Hello everyone!

Today's post is about the new Roller Lash Mascara from Benefit.
I'm sure, most of you already heard about it, so many people are raving about it lately and well, I am too.
When it comes to mascara, the drugstore ones were always enough for me so I wasn't sure if I really need the Roller Lash  in my life.
Benefit says, that the Roller Lash will lift your lashes so you won't need an eyelash curler, separates and lifts your lashes.
Oh and the packaging is, like everything from Benefit, super adorable. 
It reminds of one of those hair curlers women used in the 1950s. Who wouldn't love that? 
But anyways, I wasn't sure if I should get my hands on it.
So I read reviews on other blogs, watched YouTube videos and went to my local Benefit counter to try it.
And after some decision time, I found myself at the counter again, grabbing the Roller Lash. Funny, how that always happens.

Heute dreht sich hier alles um Wimpern.
Genauer gesagt, um die neue Roller Lash Mascara von Benefit.
Die meisten von euch haben bestimmt schon von ihr gehört, seit sie vor kurzem rausgekommen ist, wird sie gehyped wie sonst was! Das ging an mir natürlich auch nicht vorbei und ich dachte mir, die muss ich mir mal genauer anschauen.
Was Mascara angeht, bin ich eigentlich eher der Drogerie-Typ gewesen (was tatsächlich fast nur bei Mascara der Fall war, schade für meinen Geldbeutel), daher war ich erstmal skeptisch, ob diese High End Mascara wirklich den ganzen Wirbel wert ist.
Benefit verspricht, dass die Roller Lash den Wimpernzangeneffekt ohne Wimpernzange erzeugt, die Wimpern trennt und durch den Schwung das Auge optisch geöffnet wird. Klingt erstmal super.
Und natürlich, wir kennen es ja schon von Benefit, die Aufmachung der Mascara allein ist schon Gold wert.
Sie erinnert an die Lockenwickler der 50er Jahre und hat einen wunderschönen Schriftzug, mit sowas kriegt man mich ja.
Trotzdem war ich nicht sicher, ob ich die Mascara wirklich brauche. Ich war ja mit meinen Drogerieprodukten im Großen und Ganzen zufrieden.
Also begann wieder meine "Vor dem Kauf" Routine.
Ich schaute YouTube Videos, las Reviews auf anderen Blogs und probierte sie das ein oder andere mal an meinem Benefit-Counter aus. Also nicht an meinem eigenen. Hab gar keinen. Leider. An dem bei mir in der Stadt, natürlich.
Und wie das Leben so spielt, fand ich mich dann doch vor einigen Tagen mit dem Roller Lash im Körbchen an der Kasse stehen. 


The brush is a little special. It's a rubber brush (I normally don't really like rubber brushes though, but this one is different) which has shorter bristles on one side and longer, crossed bristles on the other. I'm so good at discribing. Not. But you'll get it if you take a look at the close up photo below.
And with a special design, there comes a special application.
The lovely girl at the counter showed me the technique, called Hook 'n Roll, you have to use to get the most out of your new mascara.
I saw a few videos on YouTube where the girls used it like every other mascara and the results weren't that great. But well, sometimes you should just read the instructions. Even on a mascara. It's worth it.
You find a great "How To" video from benefit on their YouTube channel but I'll quickly explain it to you as well (click!).

Das Bürstchen der Roller Lash ist anders, als bei "normalen" Mascaras. Es besteht aus Gummi (bin ich ja erstmal kein Fan von, allgemein, aber diesmal ist einfach alles anders!) und hat auf der einen Seite kurze und auf der anderen Seite längere, sich kreuzende Borsten.
Auf dem Foto weiter unten sieht man es besser, meine Beschreibungskünste sind nicht die allerbesten.
Und mit einem speziellen Bürstendesign kommt auch eine spezielle Auftragetechnik daher.
Das Gute daran, Produkte am Counter und nicht online zu kaufen ist nunmal, dass die lieben Verkäuferinnen wirklich Ahnung haben. Und sie verraten einem Dinge, die man sonst nicht wüsste.
So hat mir eine ganz liebe Benefit-Mitarbeiterin ganz genau erklärt, wie ich die Roller Lash zu benutzen habe, um wirklich den gewünschten Effekt zu erhalten.
Sie funktioniert nämlich nicht, wie jede andere Mascara.
Gut, es liegt auch eine Anleitung der Mascara bei, aber wie ich mich kenne, wäre die direkt in der Ecke gelandet.
Ich habe im Nachhinein auch festgestellt, dass viele Mädels in ihren YouTube Videos nicht die besondere Technik anwenden, daraufhin gab es eben nicht die super geschwungenen Wimpern.
Also wir merken uns: Wenn eine Anleitung bei liegt, und auch wenn es nur Mascara ist, lesen!
Ihr findet ein tolles Video auf dem offiziellen YouTube Channel von Benefit, da wird alles nochmal ganz genau gezeigt und erklärt (klick!).


You place the mascara brush with the short bristles directly on your lash line and then roll it through your lashes, so you end with the long bristles on your lash tips. That takes a little practice but once you discovered how to do it, it's really easy. 
I recommend to do that a few times, so you really got all those little lashes rolled up and covered with mascara. And I feel like one coat is enough, I mean you don't have to dip the brush into the tube again.
On the lower lashes, just use it as a regular mascara or take a drugstore one if you don't want to waste it for that (I do it that way).

Also, man beginnt damit, das Bürstchen mit den kurzen Borsten zuerst am Wimpernkranz anzusetzen und dann in einer drehenden Bewegung nach oben zu bewegen, sodass man mit den langen Borsten die Spitzen der Wimpern erreicht. Das ganze nennt sich dann Hook 'n Roll. 
Ist am Anfang etwas schwierig, aber wenn man den Dreh erstmal raus hat (hallo, Wortspiel!) ist es eigentlich ganz simpel.
Das ganze wiederhole ich dann gerne ein paar mal, bis ich auch die allerkleinste, unscheinbarste Wimper erwischt habe. 
Aber tatsächlich, es tut überhaupt nicht Not, das Bürstchen noch einmal "aufzutanken" - das Produkt ist sehr ergiebig! Und das sage ich, die sonst fünfundneunzigmal nachgeladen hat.
Meine unteren Wimpern Tusche ich aber nach wie vor noch mit meiner Drogeriemascara. Die Hook 'n Roll Technik klappt nur bei den oberen und zum "normalen" Tuschen, möchte ich die Roller Lash dann doch nicht verschwenden. Aber das ist nur meine Meinung, kann natürlich jeder machen, wie er gerne möchte.

So let's get to my opinion.
The Hook 'n Roll technique really works for me, my lashes are incredibly curled and separated. 
My lashes are naturally pretty long though so I can't really tell if it's that amazing for people with short lashes.
The color, the black, is really intense and beautiful and the design of the brush really makes sure you get even the tiniest lash!
The curl lasts all day. Really. I haven't noticed any difference on my lashes in the evening than I the morning when I applied it.
And it's light weight so you don't feel like your eye lids are doing some workout all the time because your mascara is so super heavy. 
I really really love this mascara and for me, it holds what it promises.
But everyone's lashes are different so I recommend to go trying it out if you can before you buy it, because it's super annoying when you spend the money and are not happy with the result.
But you really should give it a try! Because nothing makes your eyes more outstanding than wonderful lashes.

So, nun aber ab zu meiner Meinung.
Ist die Roller Lash den Hype und auch ihren Preis wert?
Ich, ganz persönlich, finde... JA!
Ich hätte es ja nicht gedacht, aber zumindest bei mir hält sie wirklich, was sie verspricht.
Meine Wimpern sind von Natur aus relativ lang (nur leider blond und unsichtbar), von daher brauche ich keine Mascara, die sie optisch mich großartig verlängert.
Den gewünschten Schwung gibt sie aber und dieser hält wirklich den ganzen Tag! Und es bröckelt nichts ab. Finde ich ja auch super wichtig, es gibt nichts nervigeres als schwarze Krümelchen unter den Augen. Mascarakrümelmonster adé!
Das Produkt selbst und auch die Tatsache, dass man (bzw. ich) nicht viel davon benötigt, schafft auch ein angenehmes Tragegefühl. Die Wimpern sind nicht mehr so schwer und man hält (nach ein paar Tassen Kaffee) auch morgens um 5 schon wunderbar die Augen auf.
Also, die Roller Lash ist eine klare Empfehlung von mir, allerdings solltet ihr, wenn es irgendwie möglich ist, sie vorher einmal ausprobiert haben.
Es ist schon ärgerlich, so viel Geld für eine Mascara auszugeben und zuhause festzustellen, dass sie mit den eigenen Wimpern nicht wirklich harmoniert. 
Wimpern sind da ja doch etwas speziell, manchmal.
Aber einen Versuch ist es auf alle Fälle wert, denn was verschafft einem einen schöneren Augenaufschlag, als wunderbar geschwungene, volle Wimpern?


What's your holy grail mascara?


Much love,

Alina

Sonntag, 10. Mai 2015

Bye Bye, Dark Circles!

Hello lovely people!

Today I want to share my concealer routine with you.
When it comes to concealer, people always say things like "Girl, you don't even need concealer! You're dark circles are just not visible!". Um yep. That's because of the concealer I'm using. Thanks.
The truth is, because my skin is whiter then the White House, my undereye circles are a wonderful dark shade, something between purple and black. And with wonderful I mean horrible. Because dark circles are not pretty.
But for every No, there's a Go in the make up world. And that's where it comes to concealer.

Heute möchte ich meine Concealer-Routine mit euch teilen. 
Wenn es um Concealer geht, kriege ich oft zu hören "Ach Mädchen, das brauchst du doch nicht! Du hast doch gar keine Augenringe!". Ähm, doch. Aber es gibt Concealer. Daher sind sie unsichtbar! Zweck erfüllt.
Die Wahrheit ist, da meine Haut weißer als Weiß ist, sehen meine Augenringe umso schlimmer aus. Es ist so ein hübscher schwarz-lila Farbton. Und mit hübsch meine ich furchtbar.
Aber auf jedes Nein folgt ein Fein in der Make-Up-Welt. Und da kommt der Concealer ins Spiel.

 
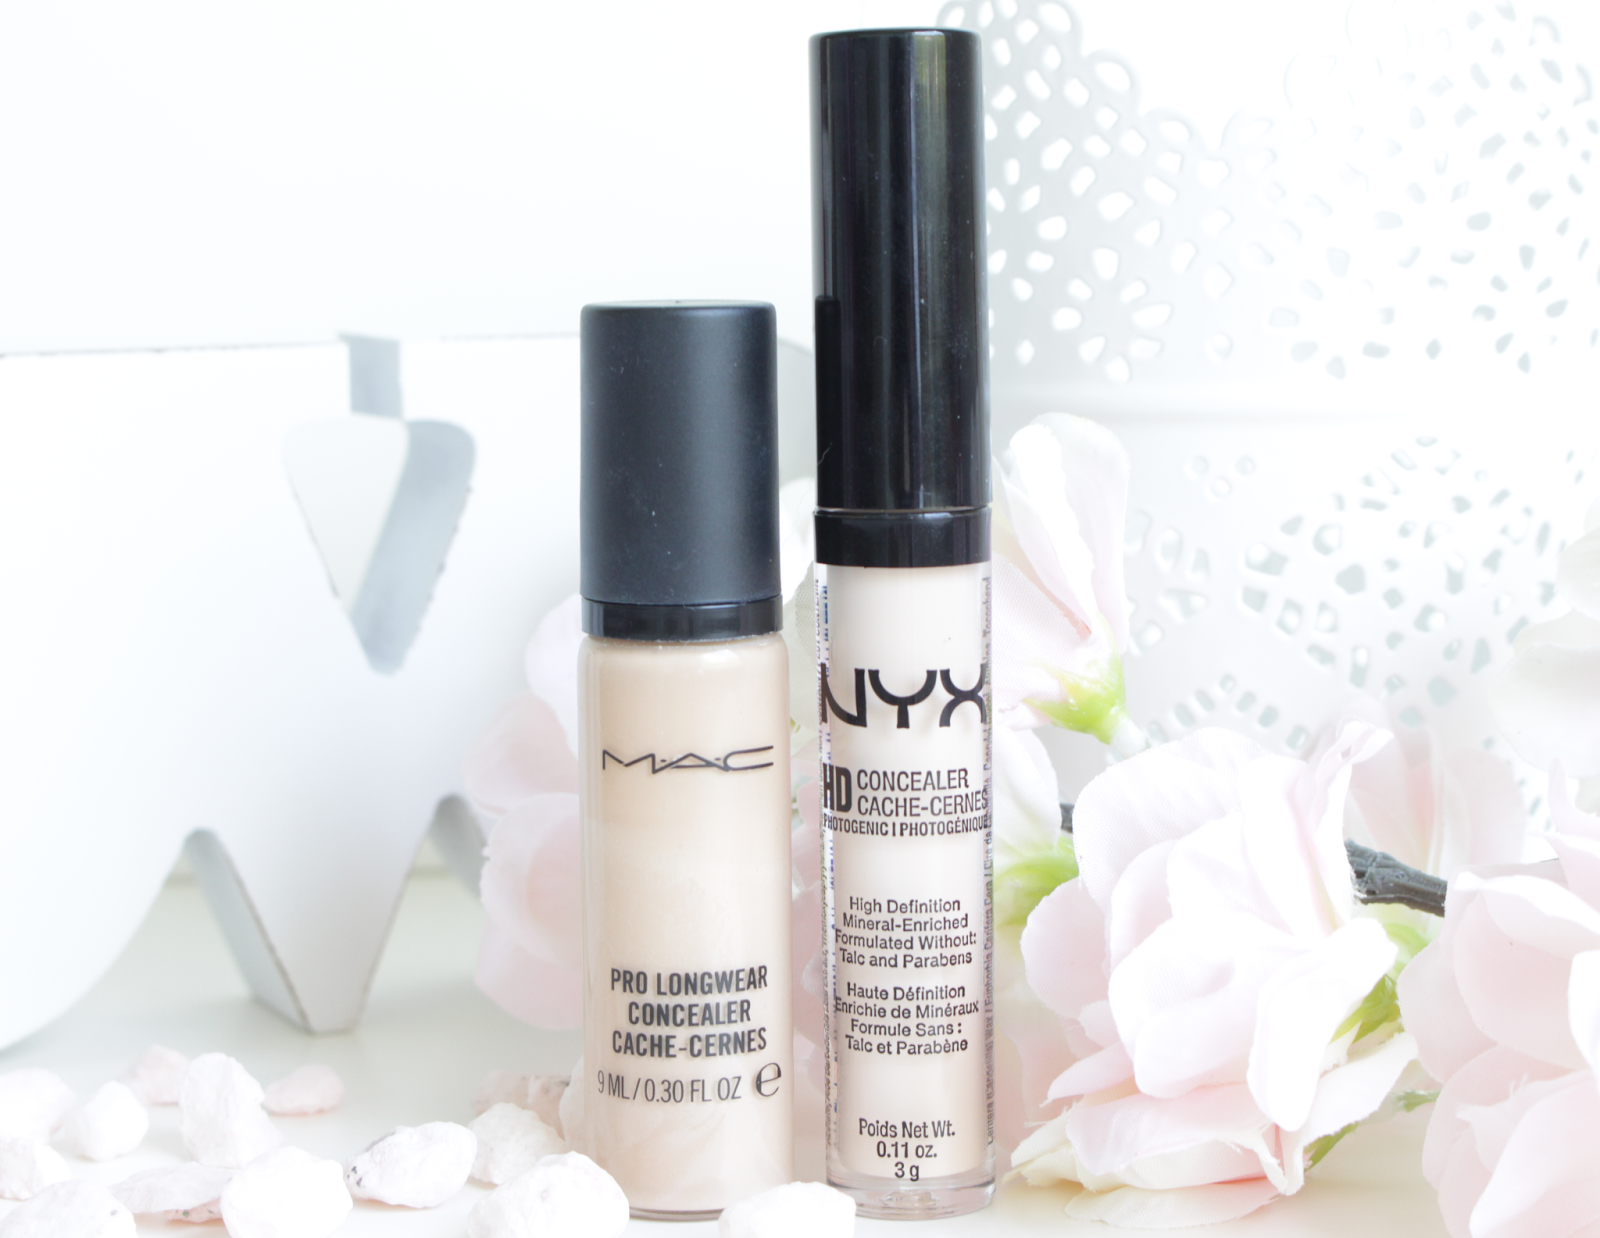
I use a combination of two different concealers and together, they work wonders.
One is the super hyped MAC Pro Longwear Concealer and the other one is the NYX HD Concealer.
I use the MAC Pro Longwear in the shade NC15, the lightest available ahade with yellow undertones. You may remember that I don't like yellow undertones for my foundation, but for concealer, it's everything because the yellow reduces the purple.
It lasts really long (well, the name already said that, but it really does) and it has an amazing coverage for being that liquidy!
The NYX Concealer is the lightest shade as well (duh!) and this is C01. 
It gives an extra amount of coverage and is super brightening!
So I conceal in three steps.
First, (okay, first, after I put moisturizer and primer on) I use about half a pump full of the MAC Pro Longwear and that's more than enough for both eyes.
I concentrate in the inner corner of my eye because that's where the most darkness appears.
I use my fingers to work that in, because the warmth of my hands helps to blend it properly. I know, most people use their concealer after they applied foundation, but I find it works best if I put this one on first.
The second step is the foundation or BB cream. When I apply it on my face, I don't keep my eye area out - with a flat top face brush it's an easy thing to add a little more coverage to your dark circles and even out the whole eye area.
At last, I take my NYX concealer and buff it in with a big concealer buffer (currently, I always find different brushes to do that with). It gives the best effect when I apply a tiny little bit on my eye lids as well, so everything looks even.
I like to use a little bit of a super fine powder to prevent all that from creasing.
And that's it! Bye bye, dark circles!

Ich benutze eine Kombi aus zwei verschiedenen Concealern und zusammen wirken sie Wunder.
Einer von ihnen ist der gehypte MAC Pro Longwear Concealer und der andere der NYX HD Concealer.
Ich benutze den MAC Pro Longwear in der Farbe NC15, der hellste Farbton mit gelben Untertönen. Jetzt erinnert ihr euch vielleicht, wie ich gelbliche Foundations hasse. Gut, nicht hasse, aber sie passen eben nicht zu meinem Hautton.
Bei Concealer aber ist es super praktisch, da das Gelb den Lilastich der Augenringe reduziert! Hallo, Komplementärfarbenkontrast.
Der Pro Longwear hat eine tolle Deckkraft und hält (wie der Name schon sagt) wirklich lange.
Den NYX Concealer benutze ich wieder in der hellsten Farbe (Überraschung), dies ist C01.
Er hilft noch etwas mehr, die Augenringe zu reduzieren und hellt die ganze Augenpartie gleichzeitig etwas auf.
Also, ich conceale in drei Schritten.
Ich beginne (nachdem bereits Tagescremen und Primer aufgetragen wurden), den MAC Pro Longwear aufzutragen. dafür nutze ich am liebsten meinen Finger, weil er sich so durch die Körperwärme am schönsten verblenden lässt. Ich weiß, die meisten Leute tragen Concealer erst nach ihrer Foundations auf, aber für mich funktioniert es so am besten.
Ein halber Pumpstoß ist übrigens für beide Augen mehr als ausreichend!
Dann schnappe ich mir meine Foundations oder BB Cream und arbeitendes auch noch etwas über die Augenringe, sodass der Pro Longwear noch mehr mit dem restlichen Make-Up verschmilzt.
Als letzten Schritt nehme ich den NYX Concealer und verblendenden mit einem großen, etwas spitz zulaufenden Pinsel (man nenne mir den Fachbegriff!), das ist übrigens keine Pflicht, mit anderen Pinseln hat es mindestens genau so gut geklappt. Ein kleines bisschen trage ich auch auf meinem Lid auf, damit alles ebenmäßig aussieht.
Optional dann noch ein bisschen mit feinem Puder fixieren, damit alles an Ort und Stelle bleibt und das war's!
Bye bye, Augenringe!
 
From this...

to this!

Much love,

Alina


Freitag, 3. April 2015

Revlon Colorstay Foundation (Normal/ Dry Skin) 110 Ivory // Review & Swatches

Hi everyone!

On my journey to find the perfect foundation, I stumbled across the Revlon Colorstay foundation.
I am super duper pale and it's such a struggle to find a matching foundation. Everything's either too dark or way too yellow.
No, I don't want my face one million shades darker than the rest of my body nor want I to look like a grown up Lisa Simpson.
But the color isn't everything. I need a good amount of coverage as well and the foundation should last longer than two hours. Maybe even a whole day. Is that too much to ask for? Well, I think not. 
So the Revlon Colorstay foundation comes in two types, one for combination to oily skin and one for normal to dry skin. Even though my skin tends to be a bit more on the combination side, I decided to buy the one for normal to dry skin, just because I read horrible reviews about the other one.

Auf meiner Reise, die perfekte Foundation zu finden, bin ich vor ein paar Wochen über die Revlon Colorstay Foundation gestolpert.
Wenn ihr so blass seid wie ich, kennt ihr das Problem bestimmt. Jede Foundation ist entweder viel zu dunkel oder viel zu gelblich. Hallo, liebe Kosmetikunternehmen, nicht jeder möchte ins Solarium gehen oder sich mit tonnenweise Selbstbräuner einschmieren!
Oft ist auch der hellste Ton einer Foundation (man nehme z.B. die Hello Flawless von Benefit, die ich sooo gern probieren würde) noch zu dunkel und für mich zu gelbstichig.
Denn nein, mein Gesicht soll leider nicht fünf Millionen mal dunkler als der Rest meines Körper sein und überhaupt möchte ich auch nicht wie eine ältere Version von Lisa Simpson aussehen. So sorry.
Aber allein die Farbe ist es leider auch noch nicht, die für die perfekte Foundation stimmen muss.
Außerdem benötige ich eine mittlere bis hohe Deckkraft und (ganz ganz wichtig!) die Foundation muss halten. Und zwar nicht nur zwei Stunden. Am besten den ganzen Tag. Ist das denn zu viel verlangt?
Auf meiner Suche bin ich also, wie schon gesagt, auf die Revlon Colorstay Foundation gestoßen.
Sie kommt in zwei Ausführungen daher, einmal für ölige und Mischhaut und für normale bis trockene Haut. Nun ja. Meine Haut findet sich eher auf der Mischseite wieder, allerdings habe ich über diese Foundation ausschließlich schlechte Reviews gelesen, also habe ich die für Normal/ Dry Skin bestellt.

 
I got the Revlon Colorstay foundation in their lightest shade, 110 Ivory.
The first Thing I noticed: no pump. Awesome. But well, there are things worse than that and you get used to the pouring method.
110 Ivory is a cool toned super light color and a nearly perfect match for me.
It has a medium to full coverage and is definitely buildable, but gets a bit hard to blend when you apply more. It covers up most of my imperfections, but if there are tricky Little spots on my face, I need to take a bit of concealer afterwards to make them disappear.
I like to apply the Colorstay foundation with a flat top face brush, I use the Zoeva 104. I tried it with a stippling brush as well, because I liked the natural look it gave me with the MAC Studio Fix Fluid Foundation, but it didn't really worked with the Colorstay. It didn't gave me the coverage I want, but maybe it's good for a "No Make-Up" look.
Let's talk about the finish. On me, it dries super matte. One thing I don't really like, it just Looks a bit unnatural. But with a brightening primer and some dewy finish setting spray, you're good to go.
And of course, if you're into matte foundations - here you go! 
On the bottle you see that sticker which says, it'll last for 24 hours. Well, I've never worn it for 24 hours straight. I need to sleep. Without foundation on my face. But it lasts super well on me, when I apply it at 6 in the morning, it still looks pretty nice when I take it off at night! Yay. I've never experienced that with a foundation. I always had to touch up or apply powder underneath, but that's not necessary here.

Ich habe mich (Überraschung!) für die hellste Nuance 110 Ivory entschieden.
Zuerst viel natürlich auf: kein Pumpspender. Na toll. Aber gut, es gibt schlimmeres.
110 Ivory ist ein sehr hübscher kühler Ton und wirklich sehr hell. Verglichen mit der MAC Studio Fix in NW10 ist die Colorstay Foundation etwas rosiger, kühler und noch einen Hauch heller.
Ich würde beinahe behaupten, es ist der perfekte Ton für mich. Endlich.
Die Foundation hat eine mittlere bis hohe Deckkraft, wobei ich sie eher noch im mittleren Bereich einordnen würde. Man kann sie noch etwas schichten, muss dann aber doch etwas aufpassen, weil sie sich dann nicht mehr so super verblenden lässt. Kleiner Minuspunkt an dieser Stelle.
Ich trage die Colorstay am liebsten mit meinem Zoeva Buffer 104 (für alle, denen das nichts sagt: Das ist einer dieser Pinsel mit dem abgeflachten Kopf) auf. Ich habe es auch mit einem Stippling Pinsel versucht, das hat aber leider nicht das erwünschte Ergebnis gebracht. Von der Deckkraft ist dadurch viel verloren gegangen, aber dadurch eignet es sich vielleicht ganz gut für einen "No Make-Up" Look. Mal ausprobieren.
Kommen wir aber zum Finish. An mir wirkt die Colorstay Foundation super matt. Mag ich dann doch nicht so gern, sieht ziemlich unecht aus. Aber Primer und Setting Spray sind ja zur Not immer zur Stelle und verhelfen auch hier zu einem natürlicheren Aussehen.
Falls ihr aber Fans von matten Foundations seid, ist dieses natürlich spitze!
Man sieht auf dem Fläschchen einen Sticker, der einem verspricht, die Foundation solle 24 Stunden halten. Naja. Normalerweise trage ich meine Foundation nicht 24 Stunden. Muss ja auch mal schlafen. Ohne Foundation. Aber trotzdem, wenn ich sie morgens gegen 6 Uhr aufgetragen hab, sah sie abends immer noch ziemlich super aus. Da war ich doch ziemlich beeindruckt. Sonst muss ich nach ein paar Stunden immer mal auffrischen, oder Puder unter der Foundation auftragen, um die Haltbarkeit zu verlängern. Aber nicht hier.


All in all, I'm pretty happy with this foundation, mostly because the color suits me best out of all of my foundations.
You can vary the finish and it lasts super long. Oh and of course, the price. I got it from Amazon for about 11€, I guess that's my cheapest foundation ever. 
But there's one thing I have to mention: The smell.
It's horrible. It has such a super strong weird smell, I can't even describe it. 
You get used to it and it disappears a few minutes after you applied it, but still. If you're sensitive when it comes to perfumed things, don't take that one. You'll regret it.

Insgesamt bin ich sehr zufrieden mit dieser Foundation. Hauptsächlich, da es endlich mal ein passender Farbton für mich ist.
Das Finish lässt sich etwas variieren und sie hält super lange. Oh und nicht zu vergessen, der Preis. Ich habe sie bei Amazon für etwa 11€ bestellt (richtiges Schnäppchen), den Link findet ihr hier. Gut, jetzt sehe ich gerade, dass sie momentan bei 14€ liegt. Geht auch noch, aber vielleicht fahren sie ja mit dem Preis nochmal etwas runter. Wäre ja auch ganz nett. Sparen ist immer gut.
Aber leider leider gibt es doch noch einen Punkt, der nicht hinten rüber fallen darf. Der Geruch. Er ist, mild ausgedrückt, furchtbar. Irgendwie merkwürdig parfümiert, künstlich und vor allem sehr stark. Gut, man gewöhnt sich an alles und er verfliegt auch nach einiger Zeit, aber wenn ihr da empfindlich seid - Finger weg!

I hope this was a bit helpful! If you have any other questions, feel free to ask!


Much love,

Alina

Freitag, 6. März 2015

MAC "Dame" Powder Blush

Hi dolls!

Since spring is just around the corner, I want to show you my new favorite spring blush - MAC "Dame".
I got it a few weeks ago when I was searching for a spring-alternative to my beloved winter-blush "Breath Of Plum" (from MAC as well, I just love MAC blushes... and MAC in general) and it was love at first sight. Honestly. True blush love.
"Dame" is a light pink satin blush with a tiny little bit of shimmer which is almost invisible.
Da der Frühling jetzt (hoffentlich) nicht mehr lange auf sich warten lässt, wollte ich euch mein neues liebstes Frühlings-Blush zeigen - MAC "Dame".
Vor ein paar Wochen war ich auf der Suche nach einer Frühlingsalternative für mein geliebtes Winter-Blush "Breath Of Plum" (natürlich ebenfalls von MAC, ich liebe einfach deren Blushes... oder MAC generell) und stolperte am heimischen MAC-Counter über "Dame". Rosa, leicht, frühlingshaft.  Ich möchte ja nicht übertreiben, aber man kann schon sagen, es war Liebe auf den ersten Blick.
"Dame" ist eins der Satin Blushes (tatsächlich, Satin Finishes gibt es nicht nur bei Lippenstiften!) und enthält daher einen ganz leichten Schimmer, der aber wirklich kaum wahrnehmbar ist.

 
"Dame" is a lovely pink shade and perfect for light skin tones. Well, I'm sure it'd suit many skin tones though. It's worth a try!
If you apply it lightly, it gives a beautiful natural hint of blush to your cheeks - super pretty! 
But it really is buildable if you like to get a bit more intense with the color.
I highly recommend this blush to everyone who's looking for a bit of pink (and who doesn't?) and loves a natural look.
Wenn ihr das perfekte Rosa such - "Dame" bringt es mit. Nicht zu rot- oder blaustichig, einfach perfekt. Es passt besonders gut zu helleren Hauttypen, aber welchen Hauttyp ihr auch habt - probieren geht über studieren, also auf zu MAC!
Wenn man es nur leicht aufträgt, erhält man einen wunderschönen Effekt von natürlich geröteten Wangen, aber die Farbe lässt sich auch sehr gut intensivieren, wenn man doch einen etwas kräftigeren Look bevorzugt. Denn manchmal ist mehr eben mehr, vor allem, wenn es um Rosa geht.


Much love,

Alina
 

Samstag, 21. Februar 2015

The Perfect Setting Spray Combo // The Body Shop Vitamin E Face Mist &NYX Dewy Finish Setting Spray

Hi dolls!

Lately, everyone's talking about setting spray. When I first heard about it, I was like "What in the world is this? Like deodorant for your face? Or parfume? Or what?". Confusing. But setting spray became one of my most important items now and I can't imagine a life without it.
Today, I want to show you my favorite two setting sprays and together, they are perfect.
On the left, we have The Body Shop Vitamin E Face Mist and on the right you see the NYX Dewy Finish Setting Spray.
Zurzeit redet alle Welt über Setting Sprays. Als ich zum ersten mal davon gehört habe, dachte ich "Was bitte soll das sein? Deo für dein Gesicht? Oder Parfüm? Oder was?". Die Beauty-Welt kann schon verwirrend sein. Aber mittlerweile ist Setting Spray für mich unumgänglich geworden. Könnte mir kein Leben mehr ohne vorstellen. Muss ich zum Glück auch nicht.
Heute zeige ich euch meine zwei allerliebsten Setting Sprays und zusammen sind sie einfach unschlagbar.
Links auf dem Bild seht ihr das The Body Shop Vitamin E Face Mist und rechts haben wir das NYX Dewy Finish Setting Spray.

 
You use setting spray after you applied your foundation (and powder and bronzer and blush and everything you want to put on your face) to settle everything down, bring it all together, make your skin looks more smooth and natural, less cakey and it makes your make up last longer. Sounds amazing, doesn't it? And it really does work. You just spray it on and wait for the magic to happen.
I always use the The Body Shop spray first to refresh my face and settle my make up and the NYX one is great for a dewy look. 
Side note: There's a matte version of the NYX setting spray as well, so if you have oily skin I'd recommend that one.
Ihr sprüht das Setting Spray (gibt's dafür eigentlich ein deutsches Wort?) auf, nachdem ihr eure Foundation (und Puder und Bronzer und Rouge und was immer ihr sonst noch gern benutzt) aufgetragen habt um alles zusammenzubringen, damit sich euer Make-Up setzt, um einfach frischer, natürlicher und strahlender auszusehen. Oh, und euer Make-Up sollte länger halten. Sollte. Dazu später mehr.
Ich benutze immer zuerst das Body Shop Spray, um nicht so "gepudert" auszusehen und anschließend ein paar Spritzer des NYX Sprays für ein strahlendes Finish (immer dieses Englisch zwischendurch. Kann auch nicht ohne.).
Übrigens: Das NYX Spray gibt's auch in einer matten Version, für die Mädels unter uns, die eher zu öliger Haut neigen.

 
The The Body Shop Face Mist contains rose water and really hydrates and refreshes your skin. I have really sensitive skin, but it didn't broke me out at all. They say you can use it on all skin types. Well, at least on my weird combination sensitive skin it worked. But maybe you should try it before you buy it (yay, rhyme.) so you won't waste any money if your skin doesn't like it. You'll get it in every store of The Body Shop and online in the official website here.
Das The Body Shop Face Mist enthält Rosenwasser und erfrischt euer Gesicht ganz wunderbar, besonders im Sommer gerne in der Handtasche dabei (für die Erfrischung zwischendurch).
The Body Shop sagt, es ist für jeden Hauttyp geeignet. Nun habe ich nicht jeden Hauttyp und kann das daher mehr schlecht als recht beurteilen, aber bei meiner merkwürdig empfindlichen blöden Mischhaut funktioniert es wirklich toll! Aber vielleicht solltet ihr es erst einmal ausprobieren, bevor ihr es kauft. Besser ist es. Kann man aber, soweit ich weiß, in jedem Body Shop. Sonst einfach mal fragen, "Fragen kostet nichts" hat Opa immer gesagt. Recht hat er.
Ihr bekommt es, wie gesagt, in jedem Body Shop und auf der offiziellen Website hier.

 
The NYX Dewy Finish Setting Spray gives your skin (surprise) a dewy finish. You won't look oily though, it just gives a natural pretty glow and makes you look less cakey. I haven't noticed that it extends the lasting time of my foundation though, but maybe it that's just because my skin is a little weird. You should use this before you apply your mascara - it's water based and I smudged my whole eye make up when I used it afterwards. Not so funny. You get it on every NYX counter and online on the NYX website.
Das NYX Dewy Finisch Setting Spray gibt eurem Gesicht das besagte "Dewy Finish". Meint: Euer Gesicht sieht strahlender, frischer, nicht so super matt aus. Allerdings (hier kommt das "Sollte" wieder ins Spiel) habe ich nicht wirklich feststellen können, dass es dafür gesorgt hat, dass mein Make-Up länger hält. Liegt aber vielleicht nur an meiner Haut, kann bei euch ganz anders sein.
Allerdings empfehle ich doch, es vor dem Wimperntuschen aufzusprühen. Es ist wasserbasiert und hat mir schon das ein oder andere Augenmakeup zerstört, wenn ich es doch mal nachher benutzen wollte. Und mit "wollte" meine ich "hab's vorher vergessen". Und mit "zerstört" meine ich "verschmiert und zum Panda mutiert".
Ihr bekommt das Spray an allen NYX Countern (zum Beispiel im Douglas) und online hier.


Nail wraps from Miss Sophie's (click!) on my nails here!
 

Much love,

Alina

Samstag, 7. Februar 2015

MAC "Brave" Lipstick // Review & Swatches

Hi dolls!

Today's post is all about my new holy grail lipstick "Brave" by MAC.
 

I'm pretty sure you already heard about it and if not, "Brave" is the lipstick, Kylie Jenner (one of the younger Kardashians) normally wears to get her gorgeous and full lips. Yep, no injections needed if you know how to perfectly over-draw your lips. I don't, so I keep going with thin lips for now. But that's okay. Kylie uses this lippie in combination with the liner "Soar" (MAC here as well!). Just for you to know, I didn't get this one. "Brave" was enough. For now. Let's see what the time will bring.
Ich bin sicher, ihr habt es schon gehört, aber falls nicht: "Brave" ist der Lippenstift, den Kylie Jenner (eine der jüngeren Kardashians) mit ihren wunderschönen und vollen Lippen berühmt gemacht hat. Jawoll, man muss sich nichts spritzen lassen, um aus dünnen voluminöse Lippen zu machen, wenn man es beherrscht, sie perfekt überzumalen. Das tue ich nicht. Hab's versucht, sah eher aus, als hätte mich ne Biene gestochen. Nicht so schön. Belasse ich es doch erstmal bei meinen dünneren Lippen, man kann schließlich nicht alles haben. Kylie kombiniert "Brave" mit dem Lipliner "Soar" (ebenfalls von MAC), aber ich dachte, "Brave" ist erstmal genug. Bin nicht so das Lipliner-Mädchen. Aber mal sehen, was die Zeit bringt.


So, "Brave" is, at least for me, the perfect dark nude. It has a bit of a pink-ish, neutral undertone and it works great with many skin tones. It's one of those "my lips, but better" lipsticks.
It's great for everyday wear, if you go to school or work or just don't feel like wearing a bright lippie. 
It comes with a satin finish (side note: that's my favorite of the MAC finishes! Yay!) and still applies really smooth! I wore the Prep and Prime base for lips (as well - surprise - from MAC) and it lasted forever! Okay, not forever. I had to touch it up after lunch, what was about six hours after the first application. But still, that's a long time. I know, the satin lippies usually last longer than others but I'm impressed time and time again. 
Für mich ist "Brave" der perfekte dunkle Nudeton. Er hat einen leichten, neutralen Pink-Stich (ganz leicht, super leicht) und passt wunderbar zu den verschiedensten Hauttönen. Er ist einer dieser "My Lips But Better" Lippenstifte. Perfekt für den Alltag, die Schule, Arbeit oder überhaupt immer, wenn man mal keinen knalligen tragen möchte.
Er läuft in der MAC-Reihe der Satin Finishes, matt mit einem ganz leichten Glanz (übrigens mein Lieblings-Finish!). Er lässt sich trotzdem sehr leicht und geschmeidig auftragen, was meiner Erfahrung nach bei den Satin Lippies nicht selbstverständlich ist. Als Base habe ich den Prep and Prime Stift von MAC benutzt, so hat "Brave" bei mir ewig gehalten. Okay, nicht ewig. Nach dem Mittag musste ich ihn etwas auffrischen (gab aber auch Schnitzel), trotzdem hat er gut 6 Stunden perfekt gehalten. Das kennt man zwar von den Satins, bin aber jedes mal wieder begeistert.


If you are able to get it (I know it's sold out EVERYWHERE lately - thanks to you, Kylie!) you definitely should. I heard many people compare it to "Twig" (which one I got a couple of weeks ago because "Brave" was sold out again) and "Velvet Teddy", but I think "Brave" is much more wearable and goes with more skin tones. "Twig" and "Velvet Teddy" are both much warmer and more of a brown-toned nude.
Also, wenn ihr ihn kriegen könnt (er ist - danke, Kylie! - momentan fast überall ausverkauft) dann schlagt zu! Viele Leute vergleichen ihn mit "Twig" (den ich mir, zugegeben, auch vor ein paar Wochen kaufen musste, als es "Brave" mal wieder nicht gab) oder "Velvet Teddy", aber ich finde, "Brave" ist wesentlich alltagstauglicher und passt eher zu den verschiedensten Typen als die anderen beiden. "Twig" und "Velvet Teddy" sind beide wärmer und gehen eher ins bräunliche, passen daher (besonders "Velvet Teddy"!) nicht zu jedem - da ist ausprobieren ein Muss!

I'm really happy I finally got my hands on it! And now, I'll end this post and just sit here, admiring the beauty of my new lippie.
What do you think of "Brave"? Is it worth the hype?
Ich bin wirklich froh, dass er sich nach Wochen und Monaten der Suche endlich in meine kleine Sammlung einreihen konnte.
Was haltet ihr von "Brave"? Ist er den Hype wert?


Much love,

Alina 

Samstag, 27. Dezember 2014

YSL Rouge Volupté No. 8 // Review & Swatches

Hi dolls!

I hope your christmas was amazing and you found some time to relax over the holidays.

Today I want to show you the new member of my pink lipstick parade, the Yves Saint Laurent Rouge Volupté No. 8 "Fetish Pink" (what a daring name!).


The color itself is fantastic. It has everything a great pink lippie needs. 
It is pretty bright, so maybe a spring to summer color but who cares. No one said you can't wear those pinks in winter. Especially on Wednesdays, just go ahead!


This lipstick is, like most of the YSL I tried, very moisturizing. I usually like to wear some lip balm or the MAC prep and prime for lips underneath, but it's really not necessary with this one.
It has a great opaque finish and looks beautiful and glossy on the lips but (yep, we don't only have positive sides here) it doesn't last long. It doesn't even last medium-long. I needed a touch-up after about an hour or two and that's not funny. Lipsticks should last - remember that, YSL! This one doesn't. I tried other lippies from that brand and made the same experience so I wasn't too shocked. But still.


So, if you're searching for a bright pink Summer lippie - this one is great. But personally I think, lasting time is super important, so this lippie is maybe a bit pricey.

 
Stay beautiful! xx

Love,

Alina

Samstag, 6. Dezember 2014

Bobbi Brown Brow Kit // First Impression

Hi dolls!

Since the world finally has discovered how amazing brows are, it was time for me to jump on the bandwagon.
Well, I did my brows before, of course. I used the More Brows browgel from ModelCo but I feel like gel is just great to color your actual brows and not to fill them. So it was time for something new.

Yesterday I went to the city to get the MAC Fix+ spray but it was out of stock so I suddenly found myself sitting on the chair at the Bobbi Brown counter. Weird how that always happens.
The lady there tried different brow products on me and we both though, the kit, which contains two different brow powders, would be the best choice for me. Of course it was the most expensive product. Yay. But I got a gift card, so I told myself it's basically for free.


Let's start with the packaging. I just love Bobbi Brown's packagings, they look so classy!
It's not too big and closes very well - great for taking it in your handbag without ruining the kit and everything else you carry with you! Nobody wants brow powder anywhere else than on the brows. Obviously.

 
And tadaa! Here it is in all it's beauty.
I chose the color "Cement" what's a more cool toned one and matches my natural brow color the most.
As you see, there's a lighter shade on the left and a darker one at the right. I love using the lighter one on the outer half of my brow. I mean, I loved it when I tried it at the counter and today at home. As this is a first impression post, I haven't used it more often yet. But I guess I'll stick to it. I really love it.

 
The kit also comes with a mirror, a tiny brush and a little tweezer. Please, how amazing is this?! To be honest, this was one of the main reasons I got this kit. When I first saw it I was like "Oh yay! And they're so cute!". Yep, sometimes it's easy to impress me. Mostly when it comes to mini sized stuff. But seriously, how adorable is this mini brush? And the mini tweezer?! I'm sure they'll become best friends with my mini nail polishes.
The brush is not only adorable though. It's pretty hard and amazing for really getting the product into your brows and getting them in shape at the same time.
The tweezer is the best one I've tried so far. It was so easy to remove even the tiniest little hair with it!

 
Quick swatch of both shades!
The colors are definitely buildable but I wouldn't really recommend it if you have super thin or light brows. My brows are pretty dark and full all by themselves so this one works great on me, but you really should try it before you buy it (crazy rhyme) mostly because it's this expensive. For my fellow German girls and guys: I got it at Douglas for 50,95€.
I know, this is much. It is awesome though but honestly... not everyone of us owns a pot of gold, Bobbi! Well, this is why they call it high end make up. But as Christmas is just around the corner, maybe it's somthing you could remember when you're writing down your wish list. It's really worth having it, as I can say so far. Not only because of the mini brush. Really, the brow kit is amazing. Love at first sight.


What are your favorite brow products? I'd love to know!


Love,

Alina

Samstag, 8. November 2014

Top 5 // Favorite Pink Lipsticks

Hi dolls!

This is the first post I'm writing here in my beauty corner and I thought, the first post should be something I really relate with.
As you may know from my Instagram, I absolutely looove pink. It's just the prettiest color ever. And almost as much as I love pink, I love lipsticks. I can't go without anything on my lips and I think pink matches my super duper light skin tone the most.

So I decided to share my current top 5 pink lippies with you today!
Here we go.

 
When it comes to lip products, I usually prefer high end over drugstore ones, because my lips are very sensitive and I had really bad experiences with drugstore lippies in the past.
But NYX is different. They absolutely don't fail at lip products at all, I really really love them!
 

Let's get to my favorites now.
My number one favorite lippie is by far the MAC "Kelly Yum Yum" from the Kelly Osbourne LE.
Than we have MAC "Snob", NYX Matte Lipstick "Audrey", NYX Soft Matte Lip Cream "Tokyo" and Dior Addict Extreme "Plaza".


MAC "Kelly Yum Yum" is super bright blue based pink and really compliments fair skin tones in my opinion.
"Snob" is more like a purpelish pink, very light and more like an everday kind of lipstick.
NYX "Audrey" is a beautiful pinky pink, not too bright but still pretty bold!
As you may have noticed, "Tokyo" is not really a lipstick. Silly me. But still, it feels like a lipstick once you've applied it. It's a soft and light pink shade and so fetch!
Dior "Plaza" is the only sheer lippie on my top 5 list. It reminds me of a more wearable and sheer version of "Kelly Yum Yum".


The two MAC ones come with a satin finish, which I absolutely love!
Matte lippies can be very dry and look weird on your lips, so the satins are perfect for a beautiful semi-matte look.
Talking about matte lippies, "Audrey" is one of them, but it takes everyones fear of matte finishes away. It just glides on your lips so smooth and doesn't feel dry at all!
The "Tokyo" lip cream is matte as well. I feel like it's a bit hard to get an even finish with it, but the color is worth every little struggle. Well, at least for me it is.
As I said, "Plaza" appears pretty sheer. It's not like super sheer, just more like a pink for girls who don't want to go too extreme and you can definetly build the color up.


What are your favorite pink lippes? Is there anything you couldn't live without?
 
 
Thanks for stopping by!
 
Love,
 
Alina